In this article
Most lead magnets get downloaded once and forgotten. A mini course is different: three to five short lessons built around one problem, not a full curriculum. Finish it, and someone has already experienced how you teach, before they ever consider paying you. That is a different kind of trust than a checklist or a PDF earns.
This guide walks through the entire build: picking a topic small enough to finish in a weekend, structuring the lessons, recording them, choosing where to host them, and connecting the whole thing to your email list so it keeps running without you.
What You’ll Need
- One narrow topic your course solves in under 30 minutes total
- A way to record video: your phone, or a screen recorder like Loom
- An email tool already connected to your site (ConvertKit, Brevo, or similar)
- A place to host the lessons: a course platform, or just private video links and email
- One free weekend
If any of these are missing, stop here. Building the lessons before you have a delivery plan is the same trap that kills half-finished ebooks: you end up with content and no way to get it in front of anyone.
None of these require a paid tool to start. A free ConvertKit or Brevo plan, your phone’s camera, and a Google Drive folder cover every requirement above. Upgrade to a dedicated course platform only after the topic proves itself.
Step 1: Pick One Problem, Not One Subject
A “mini course on marketing” is a subject. A mini course on “how to write your first 5 Instagram captions when you have zero followers” is a problem. Problems have a start and an end. Subjects do not.
Look at the questions your audience already asks you in DMs, comments, or client calls. The one you answer most often, in the most similar way each time, is your topic. If you cannot summarize the outcome in one sentence (“by the end, you will have X”), the topic is still too broad.
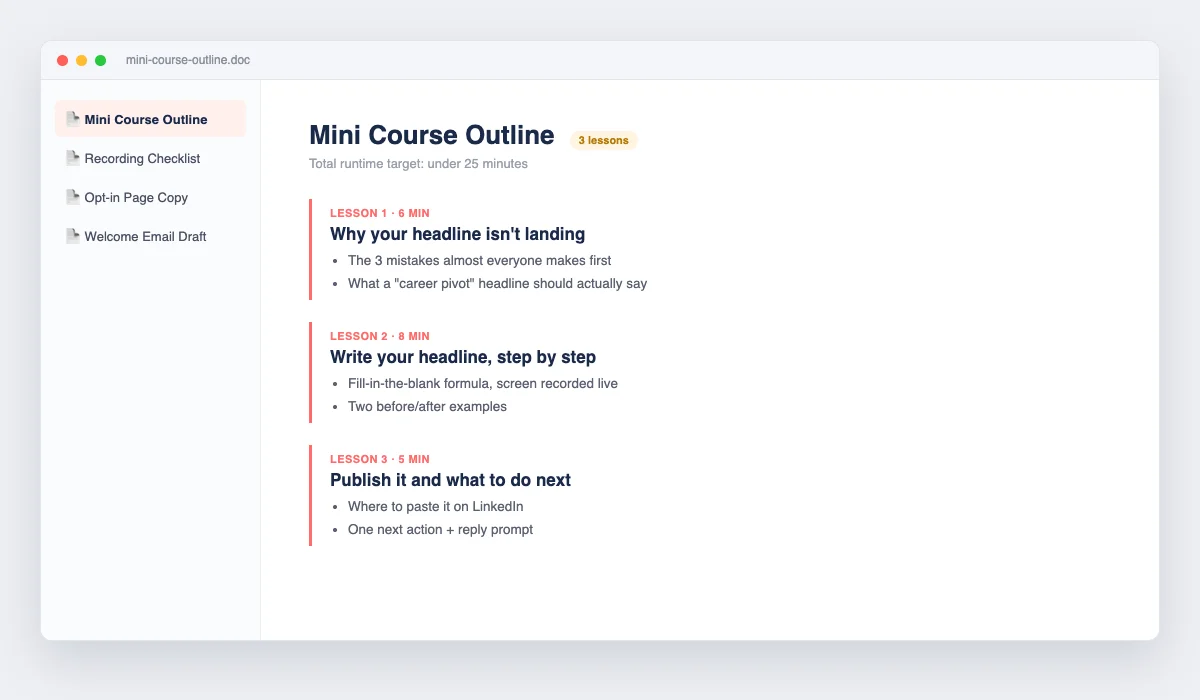
Maya, a coach, could teach “how to write a career-pivot LinkedIn headline” instead of “how to plan a career change.” Jordan, a blogger, could teach “how to build one budget tracker in Google Sheets” instead of “how to manage your money.” Both are narrow enough to finish in three lessons, and both end with the reader holding something they made themselves.
Step 2: Outline 3 to 5 Lessons, Not a Curriculum
Write down the smallest number of steps that get someone from “does not know how” to “did it once.” For most topics that is three to five lessons, each 3 to 7 minutes long.
Resist the urge to add a bonus module, a resource library, or a Q&A lesson. Every extra lesson is a place someone can stop watching before they finish. A mini course lead magnet only works if people actually complete it, because the completion is what proves you can teach.
A workable three-lesson skeleton looks like this: Lesson 1 explains why the problem happens and what most people get wrong. Lesson 2 walks through the fix, step by step, on screen or in writing. Lesson 3 shows the finished result and gives one next action. Each lesson should stand on its own; someone who only watches Lesson 1 should still walk away with something useful.
A mini course lead magnet is a short, free sequence of 3 to 5 lessons that solves one narrow problem, delivered by video or written walkthrough and gated behind an email opt-in. It exists to prove your teaching ability before someone considers paying for anything.
Step 3: Choose How You’ll Record Each Lesson
You have three realistic options, ranked by effort:
- Slides with voiceover. Build 5-8 slides per lesson in Canva or Google Slides, then record yourself talking over them using Loom or your phone’s screen recorder. Fastest to edit, no need to be on camera.
- Talking-head video. Record yourself directly, phone propped on a stack of books works fine. Builds more trust because people see you, but takes longer to feel comfortable with.
- Written lesson + short video. For a topic that is mostly reference material (a checklist walkthrough, a tool setup), a written lesson with one short demo video can outperform a full video series, because it respects the reader’s time.
Pick the format that matches how you already teach. If you explain things well over Instagram Reels, talking-head video will feel natural. If you write clear, structured captions, written lessons will come faster.
Step 4: Record the Lessons in One Sitting
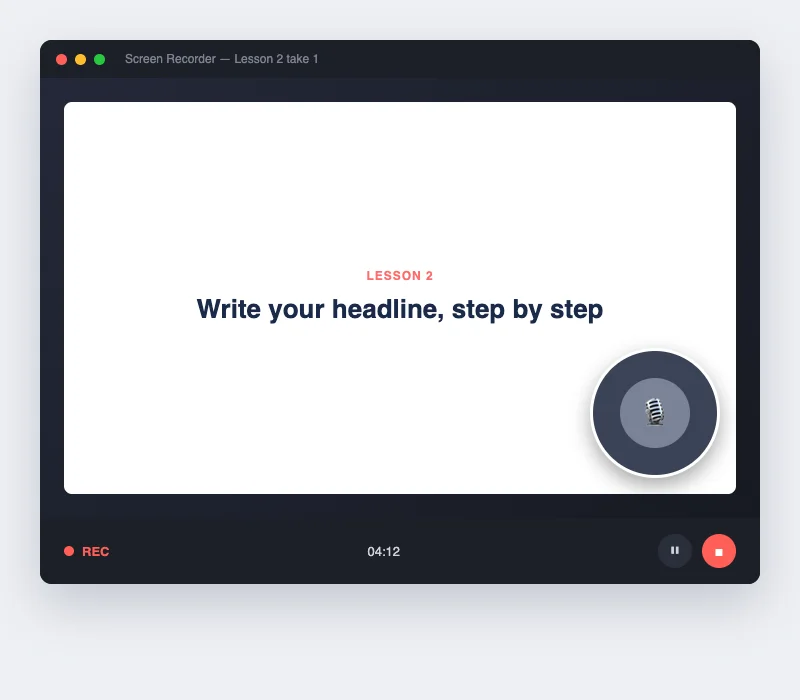
Batch-record all lessons in a single session if you can. Switching between writing, recording, and editing across multiple days is where mini courses stall the same way ebooks do.
Do not aim for polish on the first pass. A slightly imperfect lesson that ships beats a perfect lesson still sitting in your drafts. Re-record only the parts where you visibly lose your train of thought, not the parts where you say “um” once.
Step 5: Choose a Delivery Platform
You do not need a full course platform to deliver three videos. Match the platform to your list size and budget:
| Option | Best for | Setup time |
|---|---|---|
| Private YouTube/Vimeo links + email drip | Testing a mini course before committing to a tool | Under 1 hour |
| Teachable free plan | Creators who plan to sell a paid course later | 1-2 hours |
| Thinkific free plan | Similar to Teachable, slightly different pricing tiers | 1-2 hours |
| Google Drive folder + email | Simplest option, works for written lessons | Under 30 minutes |
If you are not sure you will build more courses after this one, start with private links and email. You can migrate to Teachable or Thinkific later if the mini course performs well; nothing about the migration requires re-recording.
Whichever option you pick, the lessons should already exist as standalone files before you touch the platform. Trying to build the hosting page and record the content at the same time is where a weekend project stretches into a month-long one. Get the videos or written lessons finished first, then treat delivery as a separate, smaller task.
Step 6: Build the Opt-In Page
Your opt-in page needs exactly one job: make the promise so specific that skipping it feels like a mistake. Name the exact outcome (“write your first 5 captions in 20 minutes”) instead of the format (“free mini course”).
Keep the page to one screen: headline, 3-4 bullet points describing what each lesson covers, and the email form. Do not describe your background or your business here. Save that for lesson one, where it belongs.
A headline like “The 3-Lesson Mini Course That Gets Your LinkedIn Headline Done This Weekend” outperforms “Free Career Coaching Mini Course” because it names the deliverable and the timeframe instead of the category. Under it, list what each lesson covers in one line each, so a skimmer can tell in five seconds whether this solves their problem.
Step 7: Connect Delivery to Your Email Sequence
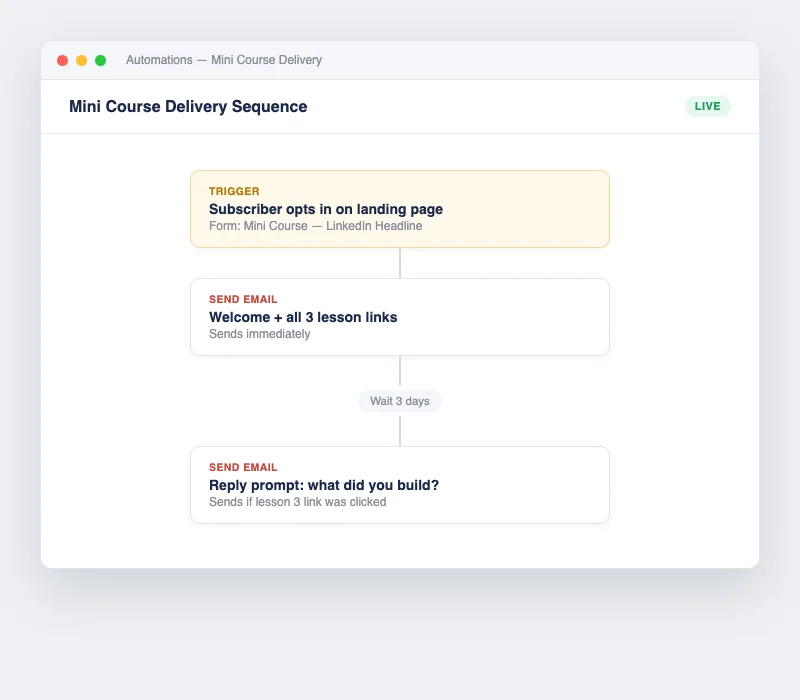
Set up your email tool to send lesson links automatically after opt-in. Two structures work:
- All at once. One welcome email with links to all lessons. Simplest to build, works well when lessons are short (under 20 minutes total).
- Drip over 3 days. One lesson per email, spaced a day apart. Keeps the course top of mind longer, but adds setup complexity and gives people more chances to drop off between emails.
For a first mini course, send it all at once. You can test a drip sequence later once you have opt-in and completion data to compare against.
Whichever structure you pick, include a short reply prompt in the final email: ask what the reader is still stuck on, or what they built using the course. Replies tell you more about what to build next than any open-rate number does, and they give you your first piece of direct feedback on whether the topic actually landed.
Step 8: Promote It Once, Then Let It Run
Announce the mini course the way you would announce anything else: a post explaining the exact problem it solves, not a generic “new freebie” post. Pin that post, add the link to your bio, and mention it once in your existing content over the next two weeks.
Ready to pick your format before you build anything? Grab the Lead Magnet Decision Matrix first, a free one-page framework that matches your audience to the lead magnet format most likely to convert for them. Takes 2 minutes. No pitch.
After the initial push, the mini course keeps working through your existing content and bio link. Revisit the topic only if your niche or offer changes significantly.
Frequently Asked Questions
How long should a mini course lead magnet be?
Keep the total runtime under 30 minutes across 3 to 5 lessons. Longer courses see more drop-off before completion, and completion is the entire point of using this format instead of a PDF or checklist.
Do I need Teachable or Thinkific, or can I just email video links?
Private video links plus an email sequence work fine for a first mini course. Move to a platform like Teachable or Thinkific only once you know the topic converts and you plan to build more courses or sell a paid one later.
Should I gate every lesson separately, or send them all at once?
Send all lessons in one welcome email for your first mini course. It is faster to build and avoids the drop-off risk of a multi-day drip. Test a drip sequence later if you want to compare completion and open rates.
What is the difference between a mini course and a full paid course?
A mini course solves one narrow problem in under 30 minutes and stays free. A full paid course covers a broader outcome across multiple modules and charges for the depth and structure. The mini course is often the proof that earns the trust to sell the full one.
Can I turn my mini course into a paid product later?
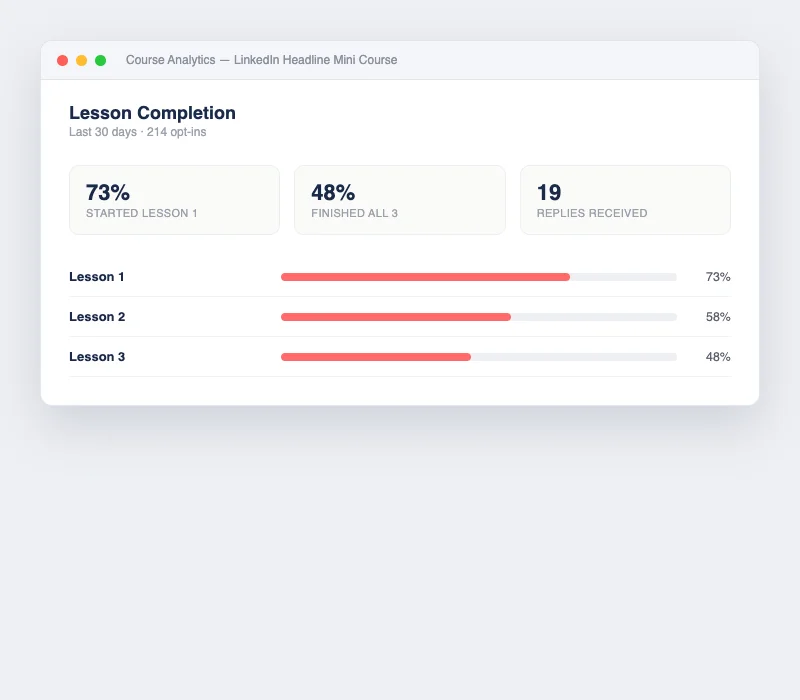
Yes. Many creators expand a well-performing mini course lead magnet into a paid course by adding modules, templates, or a community component. Watching which lesson gets the most replays is a practical signal for where to expand first.
Keep Reading
What to Do Next
Choose the path that fits where you are right now.
Your Lead Magnet Is Two Hours Away. Pick Your Format First.
One email. One page. Match your audience type to the lead magnet format most likely to convert — so you stop flip-flopping and start building.
Send Me the Decision MatrixRelated Articles
How to Create a Scorecard Lead Magnet (Step-by-Step)
How to build a scorecard lead magnet: pick one thing to measure, design scoring dimensions, write tier-based results, and set up delivery.
How to Create a Swipe File Lead Magnet (Step-by-Step)
How to build a swipe file lead magnet: pick a niche, curate real examples, annotate them, and package it for email opt-ins.
Quiz Lead Magnet: Question Design and Conversion Guide
How to build a quiz lead magnet that converts: question design, tool setup, result logic, and delivery automation. Includes format comparison data.