In this article
You do not need a designer. You do not need Photoshop. Canva’s free plan has everything you need to build a lead magnet that looks professional, converts readers into subscribers, and ships this weekend.
This guide covers the complete workflow: picking the right format, setting up your document, finding a template, writing your content in Canva, applying your brand colors, and exporting a PDF ready for delivery.
What You Will Need
- A Canva account (the free plan handles everything in this guide)
- A ConvertKit or Brevo account for automated email delivery (both have free tiers)
- A clear topic your audience is already struggling with
- About 90 minutes to two hours, uninterrupted
That is the full list. No paid Canva subscription. No design background. No third-party apps.
Step 1: Choose Your Format Before You Open Canva
The format you choose determines how you structure your Canva document. Make this decision before you touch any templates.
Formats Canva handles well:
- Checklists — A single-page PDF with numbered or grouped items. The fastest format to build. Most creators finish in under 90 minutes, including the design work. Strong converter when the topic is specific.
- Cheat sheets — One-page quick reference guides, usually organized into short sections or a table. Slightly more text-dense than a checklist, but still fast to produce.
- Workbooks — Multi-page PDFs with prompts, exercises, and fill-in fields. Canva handles multi-page documents well. Expect 2-4 hours depending on how much content you write.
- Resource lists — Curated lists of tools, links, or examples formatted as a scannable PDF. Clean and fast to create.
- Mini guides — Short guides of 3-8 pages with light layout. Good for audiences who want more depth than a single page but will not commit to reading a 30-page ebook.
Formats better suited to dedicated tools:
- Quizzes — Canva cannot handle interactive logic. Use Interact or Typeform instead.
- Long ebooks (20+ pages) — Use Beacon or Designrr for more layout control on longer formats.
- Fillable PDFs — Canva PDFs are not natively fillable. If your audience needs to type directly into the document, use Google Docs or Notion and export from there.
If you are not sure which format fits your audience, start with a checklist. It converts reliably, ships fast, and teaches you the creation workflow before you invest time in something more involved. See the checklist lead magnet guide for a format-specific deep dive.
Step 2: Set Up Your Canva Document at the Right Dimensions
Open Canva and click Create a design. Choose the canvas size based on your format:
| Format | Recommended Canva size | Why |
|---|---|---|
| Checklist or cheat sheet | A4 or US Letter | Standard PDF dimensions that display correctly in all email clients and browsers |
| Workbook or short guide | A4 Portrait, multiple pages | Clean page-by-page layout for structured content |
| Resource list | A4 or custom (1920 × 1080 px) | Wide layouts work better for tables and dense information |
| Freebie shared as social image | 1080 × 1080 px | Instagram square format if you plan to share each page individually |
The practical default for anything you deliver as a downloadable PDF: use A4 (210 × 297 mm). Readers and email clients handle this size consistently across devices. US Letter (8.5 × 11 inches) is a safe alternative if your audience is primarily in North America.
To set a custom size: click Create a design → Custom size → enter your dimensions → click Create new design.
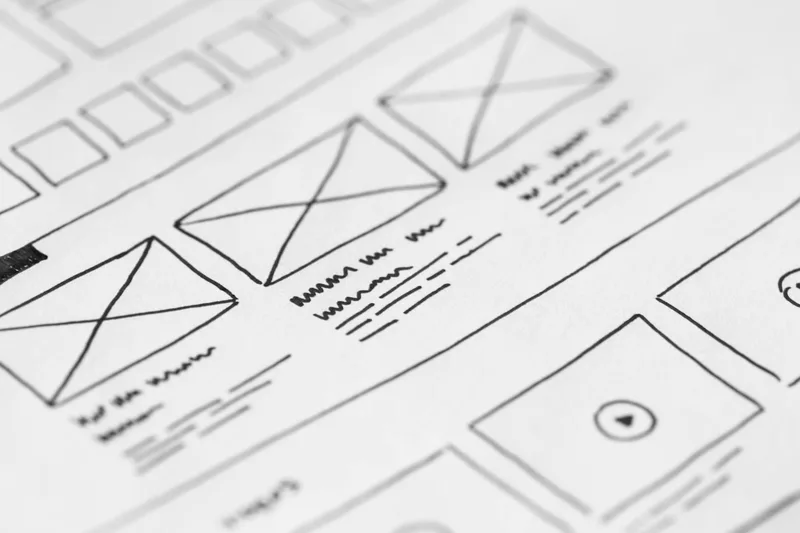
Step 3: Find a Template That Fits Your Content
Canva’s template library is large. Most of it is not useful for lead magnets. Here is how to filter for what you actually need.
In the Canva search bar, try these queries:
- “checklist template”
- “worksheet template”
- “workbook template”
- “planner template” (for structured, multi-page formats)
- “ebook template” (then simplify the layout before using)
What to look for:
- A clear visual hierarchy — title stands out, sections are easy to scan
- Enough white space for your content to breathe
- A color scheme you can swap out in under five minutes
- Minimal decorative complexity — the simpler the template, the easier it is to make it look like yours
What to avoid:
- Templates with two or three columns of text — these collapse badly on mobile PDF readers
- Heavily stylized fonts that are hard to read at small sizes
- Templates that are mostly image and minimal text — there will not be enough space for your content
Starting from a blank white canvas is also a solid option. Add a colored header bar, your logo in a corner, simple section dividers, and a footer. The result is often cleaner than most templates when you strip them back anyway.
Step 4: Write Your Content Directly Inside Canva
This is the step most design guides skip. Do not write your content in Google Docs and paste it in. Write it in Canva, inside the actual boxes where it will live on the page. When you run out of space, you cut. That natural constraint produces tighter content.
For a checklist:
- Aim for 10-15 action items. Fewer than 10 can feel thin. More than 15 can feel overwhelming.
- Write each item as an action verb phrase: “Upload your lead magnet PDF to your email platform” not “Lead magnet delivery setup.”
- Group items into 2-3 sections if they span different phases or themes. A single flat list of 15 items with no grouping is harder to scan.
For a cheat sheet:
- Use short-form definitions, key stats, or quick-reference tables.
- Leave generous margins. Readers who find cheat sheets valuable often print them and write notes alongside the content.
- Bold the key term or action at the start of each entry so eyes can scan down quickly.
For a workbook:
- Give each page a single prompt or exercise. One prompt per page forces you to think about what the reader needs to do, not just what they need to know.
- Include a brief instruction line at the top of each exercise. “Answer in 2-3 sentences” or “List up to five options” sets expectations and helps people who freeze at open-ended prompts.
- Leave visibly generous white space below each prompt. This signals to readers there is room for their response, even if they are viewing it on screen.
Title length: keep your lead magnet title short and specific. “The 10-Step Launch Checklist for New Coaches” works better than “Your Comprehensive Guide to Launching Your Coaching Business Successfully.” Specific titles outperform broad ones because they signal exactly what the reader is getting.
Not sure which lead magnet format fits your specific audience? Download the Lead Magnet Decision Matrix — a one-page visual framework that matches your audience type to the format most likely to convert. Free. No pitch.
Step 5: Apply Your Brand Colors and Fonts
This step separates a lead magnet that looks like it came from a template library from one that looks like it came from you specifically.
Colors:
In Canva’s color picker, switch from the default palette to the hex code input. Enter your brand’s primary hex code and apply it consistently across:
- Header and footer backgrounds
- Section dividers
- Bullet points or numbered list markers
- Any call-to-action text or buttons
Use your secondary color sparingly as an accent — a highlight box, a key stat callout, or the title text.
If you do not have established brand colors yet, pick one strong color and use it consistently throughout the entire document. Black and white with one accent color converts just as well as a polished full brand palette.
Fonts:
Canva’s free plan includes a good selection of readable fonts. For body text, choose Inter, Lato, Open Sans, or Source Sans Pro. All are high-readability fonts that look good both on screen and in print. For headers, you can use a bolder weight of the same font or a complementary display font.
Set body text at 11-12pt for single-column layouts. At anything smaller than 10pt, text becomes hard to read when readers zoom out to see the full page.
Limit yourself to two fonts per document. One for headings, one for body text. Using three or more fonts is the most common design choice that makes lead magnets look unprofessional — not the colors, not the imagery, the fonts.

Canva Pro users: the Brand Kit feature stores your logo, colors, and fonts and applies them to any new design in one click. On the free plan, the manual process above takes about five minutes per document.
Step 6: Add Icons or a Logo (Optional but Effective)
A few well-placed visuals can make your lead magnet feel more premium without adding meaningful design complexity.
What works:
- Simple icons — Canva’s built-in Elements library has thousands of flat and line-art icons available on the free plan. Search for your topic (e.g., “checklist,” “email,” “calendar”) and filter by style. Use icons to visually anchor section headings or key items.
- Your logo — Place it in the footer or top corner. Adds attribution and builds familiarity. Keep it small so it does not compete with the content.
- A mockup shadow — Adding a subtle drop shadow under the edge of your cover design makes the lead magnet look like a physical object. This alone can increase the perceived value of a simple PDF significantly.
What to skip:
- Generic stock photos of smiling people in office settings — they look like filler
- Decorative flourishes and borders that add no information
- Complex infographics or data visualizations — if they take more than ten minutes to build, they are a separate content project
If you find yourself spending more than 20 minutes on visuals, stop. The content is the value, not the decoration. Ship the simpler version.
Step 7: Export as a PDF and Prepare for Delivery
When your design is ready:
- Click Share in the top right corner of Canva
- Select Download
- Under File type, choose PDF Standard for screen delivery or PDF Print for higher resolution if readers will print it
- Confirm All pages is selected if your lead magnet is multi-page
- Click Download
Your file saves to your Downloads folder. Before uploading it anywhere, open the exported PDF and check for:
- Fonts that did not render correctly (rare but happens with certain custom fonts)
- Images that appear blurry or failed to export
- Any pages missing from a multi-page document
Rename the file before uploading. Do not send subscribers “Lead Magnet Design v3 FINAL (2).pdf.” Use a clean descriptive filename: “10-step-launch-checklist-magnetkit.pdf” or similar.
Once exported, upload the PDF to your email platform and set up an automated delivery sequence. For a complete breakdown of which tools handle delivery best and how to configure the automation, see the best lead magnet tools guide and the lead magnet landing page setup.
Frequently Asked Questions
Can you make a lead magnet in Canva for free?
Yes. Canva’s free plan includes enough templates, fonts, icons, and export options to build a professional lead magnet. The main limitations on the free plan are a smaller template library and no Brand Kit feature for storing brand colors and fonts. Every step in this guide works without a paid subscription.
What size should a lead magnet be in Canva?
Use A4 (210 × 297 mm) or US Letter (8.5 × 11 inches) for any lead magnet you deliver as a downloadable PDF. Both sizes display correctly in browsers and print without cropping. For social-delivered freebies, use 1080 × 1080 px for Instagram square or 1200 × 628 px for Facebook link previews.
How long does it take to make a lead magnet in Canva?
A checklist or cheat sheet takes 60-90 minutes for most first-timers, including both content writing and design. A workbook or short guide with 5-10 pages takes 2-4 hours depending on how much content you already have prepared. The design work itself is fast — most of the time goes into writing the content inside Canva.
What types of lead magnets can I make in Canva?
Canva works best for static PDF formats: checklists, cheat sheets, workbooks, resource lists, and short guides up to roughly 10-15 pages. It is not suited for interactive formats like quizzes or calculators. For quizzes, use Interact or Typeform. For long-form ebooks, Beacon gives you more layout control.
Can I use Canva free templates in a lead magnet I distribute commercially?
Canva’s free templates are licensed for commercial use, including as lead magnets. The content you add — your text, your expertise — belongs to you. Canva’s terms do not allow you to resell templates themselves as templates, but distributing a completed PDF lead magnet to your subscribers is permitted under the free plan.
Keep Reading
What to Do Next
Choose the path that fits where you are right now.
Your Lead Magnet Is Two Hours Away. Pick Your Format First.
One email. One page. Match your audience type to the lead magnet format most likely to convert — so you stop flip-flopping and start building.
Send Me the Decision Matrix